Back in the olden days I had a fingerpicking mini-course available for people who signed up for my mailing list. It’s been unavailable for quite a while and a few people have been asking about it. So here’s the first part of it and the rest of it will be available once I work out what I want to do with it.
In order to tab fingerpicking, we need to introduce some new notation. The fingers of the picking hand are referred to as:
T = Thumb
I = Index Finger
M = Middle Finger
A = Ring Finger
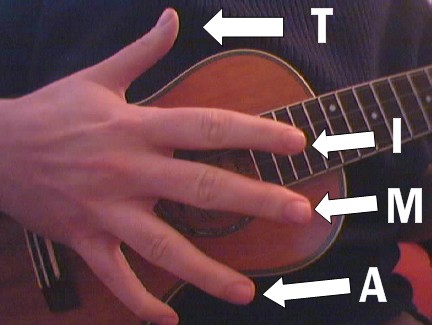
The finger names come from pulgar, indice, medius, annular.
If you need a primer on reading ukulele tab in general, check out my series of posts on how to read ukulele tab.
Each of these fingers is allocated to an individual string:
Thumb – g-string
Index Finger – C string
Middle Finger – E string
Ring Finger – A string
Like this:
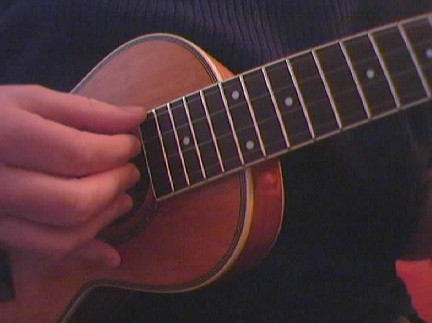
As you can see, I use my little finger as an anchor. This stabilizes the hand. However, there is a trade off. Letting you hand hover over the strings will give your fingers greater flexibility and make it easier to switch between picking and strumming.
Once you’ve got comfortable with that position, try this simple exercise.
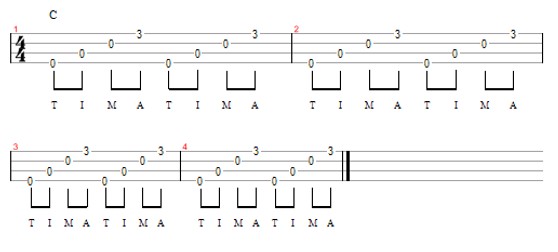
Here, we’re picking through the each string in order while holding down a C chord. When picking a note, your fingertip should be very slightly underneath the string. You pluck it by bringing your finger up and towards your head (or up and away from you head for your thumb).
Make sure you let all the notes ring into each other so that, by the time you’ve picked all the notes, a full chord is ringing.
You can see a video (mpg) of me doing this (first slowly then sped up) here:
Once you get the hang of this, you can try changing chords while playing it. Like this:
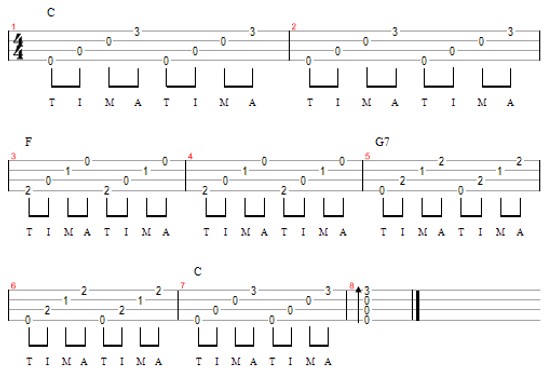
Example 2
This can feel like trying to rub your stomach and pat your head at the same time. But a little bit of practice and it start to come more naturally.


YEAH!!! thank you!
I was just saying to someone the other day that I need to find some simple picking exercises- and here you are!
mind reader?